

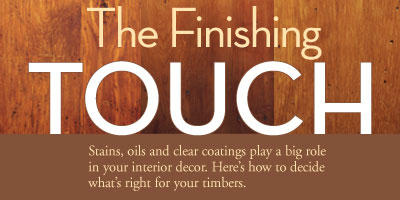
Just like the perfect birthday cake, your home's timbers need the right icing. Stains, oils and clear finishes are the sugar and sprinkles that give wood interiors their picture-perfect appearance. "Stains and other finishes help preserve the warmth of natural wood," explains Carl Minchew, director of product development at Benjamin Moore & Co. "Wood connects us to our natural world, and stains allow the gorgeous properties of wood to remain."
No matter if you choose to finish your timbers with a clear coating or a rich mocha stain, you're sure to appreciate wood's enduring beauty. "If you keep wood finished and dry, it will last forever," says Tom Prevette, business development manager for Pan Abode Homes. Different finishing options impart different looks to your decor. And our clear-cut guide will help you make sense of it all.
Pick a Product
With so many finishing options available, choosing the right product can seem a bit overwhelming. So, how do you know what kind of finish is right for your wood? "The very first choice you'll have to make when you step into the stain-and-finish aisle is whether you want a water- or oil-based product," explains Bruce Johnson, national spokesperson for Minwax and author of The Wood Finisher. "Oil bases are more popular with traditionalists, and they give you more working time, since they don't dry as quickly. This will help you avoid lap marks." However, water-based products may be more suitable when ventilation conditions aren't ideal. Water-based stains dry quickly, which could lead to lap marks, if you're not careful. But you can avoid this unsightly problem by working in small sections. Once you make the oil-or-water decision, it's time to select your specific finishing products.Here's a rundown of what's available:
Stain.
Available in nearly infinite hues, stains penetrate into wood to color rather than protect it. Opacity ranges from solid and semi-solid to transparent (clear) and semi-transparent (with a slight tint). "The amount of pigment in a stain determines its opacity," explains Carl. "If you want to not only see the grain of the wood but change its color, use a semi-solid or semi-transparent stain."Finish.
While this term is often used to refer to any wood finishing treatment, it denotes the clear protective coating that sits on the surface of the wood. "The finish lays on top of the wood and universally protects it from water, sun and other elements," says Bruce. Typically, finish is applied as a separate, final step a day or two after a stain is applied. If an oil-based stain was used, then an oil-based finish should be selected. Popular oil-based finishes include linseed and tung oils. While both cure nicely, tung oil is often preferred, since linseed oil may darken wood over time.Varnish and polyurethane.
Though they are relatively easy to apply with a brush, varnish and polyurethane are prone to dust adhesion, since they have a slow drying time. A thinned first coat may help alleviate this problem. Varnish is composed of cooking oil and a resin; polyurethane is a type of varnish made with polyure-thane resin. Despite its tendency to attract dust during application, polyurethane is touted for its durability and protective qualities.Paint.
Since paint will cover wood and change its color completely, many timber home owners avoid it. Nevertheless, paint washes may provide some color without completely hiding the wood. The most frequently seen timber-painting technique is whitewashing, where a thinned coat of paint is applied, allowing some of the wood tones and grain to peek through.Shellac and lacquer.
These types of coatings typically aren't used on timber homes because they can be brittle. They also tend to have dust-related finishing problems.Choose a Color.
Once you've decided on the type of product that's best for your timbers, you'll need to think about the color and style you want to capture. "The great thing about nature is that there's no one right answer or one right color," says Carl. "Variety is the hallmark of a natural setting." Some home owners opt for light stains; others for dark. "Just keep in mind that the color swatches you see in home outlet stores are only a rough indication of what your stain will look like," advises Bruce. "Your final result depends on your wood type, how long you let the stain soak in and your home's lighting conditions."Bruce also recommends using restraint when it comes to selecting stain colors. "Err on the lighter side," he advises. "Beams that are too dark will absorb all the light in the rooms, and if you go dark, it's not easy to lighten it up. Once stain is applied, it's pretty permanent." What's the best way to avoid a staining catastrophe? Experimentation. "Buy two or three small containers of different stains," suggests Bruce. "Test these stains on leftover wood scraps from your construction. My personal preference is a stain with a hint of tan in it, such as a golden-pecan color. This shade brings out the wood grain without making it look too dark or yellowed."
With minimal research and a little experimentation, you can eliminate the fear factor when it comes to taking that first pass with the stain brush. With the right product and color in hand, you could even call it a "stroke" of genius.
Read the full story in the May/June 2006 issue of Timber Home Living.